Hey Everyone! Dr. Jennifer here! I’m back today with a before and after feature for our blog post!
Our featured patient today is near and dear to our heart, our lovely assistant Katie!! Katie got married September 24, 2016. She approached us in preparation for her wedding smile. Katie had a crown on her left canine (#11) that she wasn’t really happy with the way it looked. She stated that it stood out, and didn’t blend in with her other teeth and had a grey line at the gum tissue. She was afraid we wouldn’t be able to make it blend and improve her smile.
For all my dental nerds out there, let’s all agree on how difficult it is to do ONE unit in the aesthetic region and get a perfect match. Oh wait! It’s IMPOSSIBLE! But it is possible to get a near perfect match. And that is what we mentally prepared Katie for, as close to perfection as humanly possible.
If you are ever preparing for restorations in the smile zone, you should plan at least 4 weeks out if you desire to whiten prior to your dental work to achieve a brighter smile. I had Katie whiten her teeth for two weeks, followed by two weeks of rest time to allow the new tooth color to stabilize before moving forward with her permanent restoration.
After the tooth color was stabilized, we began by removing the old crown. The first thing we found was the very dark, stained tooth that remained. We knew we needed to mask this color, but we did not want to use any metal. This made our decision to use a Porcelain fused to Zirconia (PFZ) crown for her replacement. We also dropped the margin of the crown below the gum line to anticipate any possible recession of the gum tissue due to manipulation. Before we continued with a temporary crown we took photos to send to the lab to get the best color match possible.
For those of you that know me, it won’t come as a surprise that I am a perfectionist. So when Katie’s crown came back from the lab, and I wasn’t thrilled with the color, we tried again. We took more photos and spent time on the phone with the ceramist at the lab to describe the characteristics of her teeth to achieve the best result. Every case is a learning experience, and I definitely learned a few things with this one. The more photos, the more description you can provide, the more likely that you will achieve the result you want.
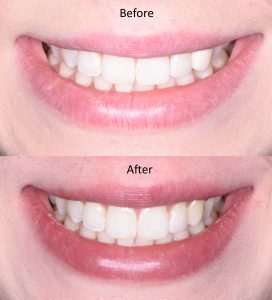
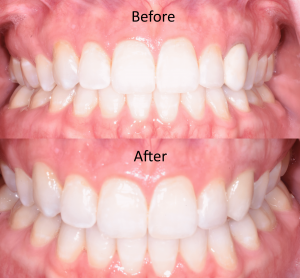
When the crown came back from the lab the second time, I was ecstatic with the result (and so was Katie!) I am so excited that my team and I were able to accomplish this great result before her big day!
Check out the before and after photos below. If you are concerned with an area of your smile, call us and schedule an appointment with me. I can’t wait to meet you and help you create your best smile!